Tuesday, September 20, 2016

Hours d'Oeuvres

Out of the Blue:


For this project, we experimented with color values to make specific combinations of red, green, and blue. They are arranged with a six number (or letter) pattern that looks like this: #RRGGBB. Certain combinations make certain colors, with the higher the value equalling darker colors, an vice versa. They used a unique system that placed values on a range from 0-15, much like how we normally use the 0-9 values. Values 10-15 are represented by a-f respectively. So, for example, #000000 would turn out black, and #FFFFFF would turn out white.


Fontastic

Our goal with this project was to figure out what fonts could be viewed by virtually all computers, as well as be able to name and utatlize all of them. This is necessary because even if someone were to build a website around a font that another computer may not process, it will not look the same. These, however, can be view by all, and therefore are 'web safe.' There are two categories: serif and sans-serif. The serifs tend to look more formal, and include Times New Roman, Georgia, and Courier New. The sans-serif fonts have a more casual look (including one that is arguably TOO casual), and include Arial, Verdana, Tacoma, Trebuchet MS, and the ever popular Comic Sans MS.

Monday, September 12, 2016

Photoshop Reflection

What I Learned

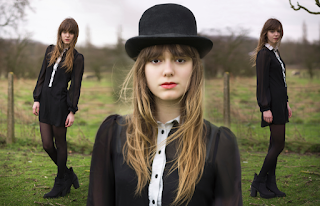
In just this short amount of time my knowledge of Photoshop has increased tenfold. I have learned new ways to remove small details from images, or layer details on top of the original for a more complete look. The first few little projects were fairly simple, but as time went on they got progressively more difficult. The collage ended this little list of projects, and was a good test of skill as it incorporated the skills learned prior.

Key Tools

First off, we used the Content Aware Fill. It is rather situational, but can save the user from doing too much work if used correctly. The Patch Tool was next, and we learned how to remove a graphic from a t-shirt. This can be used in large areas that can be fixed with a similar space. Clone Stamp and Healing Brush was next, and even though I knew how to use them prior, this project helped me refine my skills, especially using the Clone Stamp. The Spot Healing Brush proved to be a very useful tool that could do what would take a user a lot of time very quickly, and has less room for error than the Content Aware Fill tool. I used all of these for the last project, the portrait collage, which was the final step in mastering these tools.

Reflection

The tool that I enjoyed using the most was the Spot Healing Brush, which did so much for me with so little effort. It could make the sky the correct shade of blue, remove a tree limb, or fix a fence post. My strength was using the tools in somewhat different ways but still getting the same result, only easier. My weakness was taking a lot of time to fix things that I thought were not perfect because of how much of a perfectionist I am, so it took me a bit more time than others because I wanted perfect results. I would spend even more time working on them to make them exactly perfect if I was to do something differently, but otherwise I was very satisfied with my work. I would same methods to achieve the same results. I really enjoyed doing this little group of projects and I am so satisfied with my results. I like Photoshop a lot and I am always looking for new ways to use it, because I have access to it at home, so I use it in my free time.